


Farming Guides
pH in Cannabis Cultivation: How to Measure and Correct it Step by Step
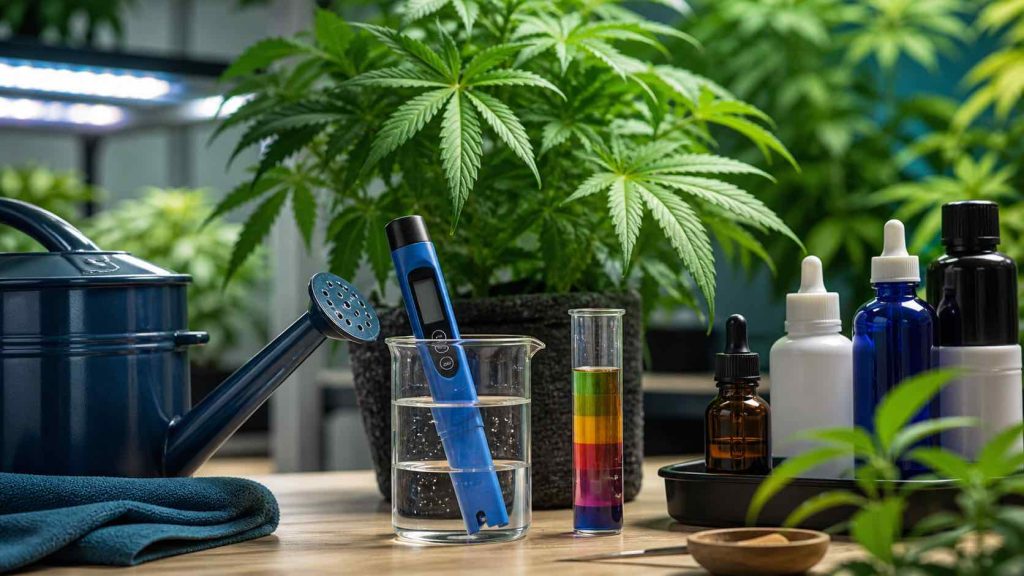
May
pH is the most problematic variable in cannabis cultivation and the one most often ignored. A grower can have the right substrate, the right nutrients, the perfect lighting and still see their plants with yellow leaves, burnt edges and stunted growth. In most of these cases, the diagnosis is the same: the pH is out of range and the plant cannot absorb what is in front of it.
This is not an exaggeration. The pH of the irrigation water is the filter that controls which nutrients are available to the roots and which are locked in the substrate even though they are physically present. Correcting the pH before adding any extra nutrients solves the 70 % of visual deficiencies that confuse beginning growers.
→ This guide is part of our Complete Guide to Growing Cannabis from Seed. To understand how pH interacts with nutrients in each phase, please also see our Complete NPK Guide.
Table of contents
- What pH is and why it matters
- Optimum ranges according to culture medium
- pH nutrient locks
- Measuring tools
- How to measure correctly
- How to correct pH
- Read the pH of the drainage
- Tap water in Spain
- Symptoms of incorrect pH vs. actual deficiency
- Most common mistakes
What is pH and why does it matter in cannabis?
The pH is a logarithmic scale that measures the acidity or alkalinity of an aqueous solution. It ranges from 0 to 14: below 7 is acidic, 7 is neutral and above 7 is alkaline or basic. Each point difference on the scale represents a tenfold change in the concentration of hydrogen ions - i.e. a pH of 5 is ten times more acidic than a pH of 6, and one hundred times more acidic than a pH of 7.
For cannabis cultivation, pH matters for a specific reason: nutrients in the soil exist in different chemical forms depending on the pH of the medium. Some of these forms are soluble and absorbable by the roots; others are insoluble and cannot be taken up by the plant even if they are present in large quantities. The pH controls which ones are available at any given time.
This has an important practical consequence: you may be adding the right fertiliser at the right dose and the plant still cannot absorb it., simply because the pH is not in the right range. Adding more nutrients in such a scenario does not solve the problem - it aggravates it, because it increases the concentration of salts in the substrate and can lead to toxicity.
Optimal pH ranges depending on the culture medium
The correct range is not universal: it depends on the substrate you use. Each medium has different physical and chemical characteristics that affect nutrient availability.
| Culture medium | Optimum range | Alert margin | Why this rank |
|---|---|---|---|
| Soil / organic substrate | 6,0 - 7,0 | Act if it comes out of 5.8-7.2 | Soil has a buffer capacity that buffers variations. Soil microbiology works best in this range. |
| Coco coir | 5,8 - 6,3 | Act if it comes out at 5.5-6.5 | Coconut is an inert medium without buffer: it does not correct the pH on its own. More sensitive to deviations. |
| Hydroponic (NFT, DWC, aeroponic) | 5,5 - 6,2 | Act if it comes out of 5.2-6.5 | No buffer substrate. The roots are in direct contact with the solution: any deviation is immediately affected. |
| Mineral substrate (expanded clay, pure perlite) | 5,8 - 6,5 | Act if it comes out at 5.5-6.8 | Similar to coco: low buffering capacity, responds as semi-hydroponic. |
Soil is the most permissive medium for pH because it has buffer capacityThe clay minerals, organic matter and microbial activity moderate the pH variations with each watering. A one-off watering with water at pH 6.8 in a soil culture does not have the same impact as in coco or hydroponics, where there is no such buffer.
If you grow in quality organic soil and your plants look good, a one-off pH variation from 5.8 to 7.2 may not produce any visible symptoms. If you grow in coco or hydroponics, the same variation can cause blockages within 24-48 hours.
Nutrient availability map by pH
This is the core of the issue. Every nutrient has a pH window in which it is available to the plant. Outside that window, even if it is in the substrate, the plant cannot take it up.
| Nutrient | Optimal availability (land) | Blocked by low pH (<5.5) | Blocked by high pH (>7.2) |
|---|---|---|---|
| Nitrogen (N) | 6,0 - 8,0 | Moderate reduction | Available; rarely blocked |
| Phosphorus (P) | 6,0 - 7,0 | Blocked (insoluble form) | Blocked (precipitates with Ca) |
| Potassium (K) | 6,0 - 8,0 | Slight reduction | Generally available |
| Calcium (Ca) | 6,2 - 8,0 | Blocked | Highly available (can block Mg) |
| Magnesium (Mg) | 6,0 - 8,0 | Blocked | Available; can be displaced by excess Ca |
| Iron (Fe) | 5,5 - 6,5 | Available (sometimes in excess) | Blocked (causes interveinal chlorosis in young leaves) |
| Zinc (Zn) / Manganese (Mn) | 5,5 - 6,5 | Excess can be toxic | Blocked |
| Boron (B) | 5,5 - 7,0 | Available | Blocked (deformed new leaves) |
The most important pattern to memorise: Low pH blocks calcium, magnesium and phosphorus. High pH blocks iron, zinc, manganese and boron. The visual symptoms of these deficiencies appear even if you have added these nutrients correctly, because the problem is not quantity but availability.
Measuring tools: which one to choose
Digital pH meter (pHmeter)
The right tool for any grower who is serious about growing. A good entry-level pH meter - not the cheapest, not the most expensive - costs between €20 and €50 and gives readings accurate to ±0.1 pH, sufficient for decision making. Brands like Bluelab, Apera or Milwaukee have models in that price range with a good quality-durability ratio of the electrode.
The key point of digital pH meters: the electrode degrades. An electrode that is not calibrated and stored correctly gives wrong readings within a few weeks. This is more dangerous than not having a meter at all, because you make decisions based on false data.
Basic maintenance of the pH meter:
- Calibrate before each measurement session or at least once a week with pH 4.0 and 7.0 buffer solutions. Buffer sachets cost less than €5 and last for months.
- Storing the wet electrode, never dry. Most pH meters are supplied with a cap in which storage solution or, failing that, distilled water is placed. An electrode that dries out loses accuracy irreversibly.
- Cleaning the electrode with distilled water after each use before storage.
pH test strips
Inexpensive (less than €5 for 100 strips) and maintenance-free. The problem is accuracy: they give a visual colour reading which, in the best case, is accurate to ±0.5 pH. For detecting that the pH is way out of range they are good. For fine-tuning between 6.2 and 6.8, they are not. If you can only choose one tool, choose the digital pH meter.
pH + EC Combo
Many mid-range pH meters also include EC (electrical conductivity) measurement, which measures the total concentration of dissolved salts in the water. Having both measurements in one device is very useful: EC tells you how many nutrients are in the water and pH tells you whether the plant can absorb them. If you are going to buy a meter, consider the combo from the start.
How to measure pH correctly
The order of operations matters. This is the correct protocol for preparing irrigation water:
- Fill the tank with the base water (tap, osmosis, rain).
- Add nutrients in the order recommended by the manufacturer. Generally: base A, base B, calcium and magnesium correctors, stimulators. Mix well between each addition.
- Measure pH now, after all the nutrients have been added. Nutrients change the pH of the water - sometimes significantly - and measuring before adding them gives a figure that does not reflect what reaches the root.
- Corrects pH if necessary with pH up or pH down (see next section).
- Wait 2-3 minutes and measure again. The pH correctors can continue to react for a few minutes. The final reading is the one that counts.
- Watering.
At what temperature to measure: pH varies with water temperature. Modern pH meters have automatic temperature compensation (ATC), but if yours does not, try to always measure at a similar temperature (20-25 °C) so that the readings are comparable.
How often to measure: ideally at every watering. In practice, if you always use the same water source and the same nutrients in similar proportions, you can measure less frequently once you know how your water behaves. But for any change - new batch of nutrients, change of water source, new crop stage - always measure.
How to correct pH: pH up and pH down
pH correctors are concentrated solutions that raise or lower the pH of irrigation water. They are added dropwise until the target range is reached.
pH down
Generally phosphoric acid or diluted nitric acid. The most common in cannabis cultivation is phosphoric acid because, in addition to lowering the pH, it provides phosphorus - useful in flowering. Nitric acid provides nitrogen, which is more suitable for vegetation, but can be problematic if there is already an excess of N.
Some natural alternatives to lower pH:
- White vinegar: diluted acetic acid. It works but the correction is less stable and can ferment in the tank if left for several hours.
- Filtered lemon juice: provides effective and organic citric acid. Same limitation as vinegar in prolonged storage.
pH up
Usually potassium hydroxide (KOH) or calcium hydroxide in solution. Potassium hydroxide is the most common because it also provides potassium. Handle with gloves: in pure concentration it is caustic.
How much to add
It depends entirely on the volume of water, the concentration of the corrector and how much the pH needs to be moved. There is no fixed dosage. The rule of thumb: start with 0.5 ml per 10 litres for a small correction (±0.5 pH), mix well, measure and adjust. pH correctors are very powerful and adding too much all at once can send the pH in the opposite direction.
Over time you will learn how much corrector your usual water needs to reach the target range. With tap water in your area you will always need similar amounts: make a note and you will have a reference for the next watering.
Reading the pH of the drainage: the real state of the substrate
The pH of the inlet water is what you control. The pH of the drainage - the water that comes out of the holes in the pot after watering - is what is actually in the substrate where the roots live. Measuring the two and comparing them gives you information you can't get any other way.
| Situation | pH input | pH drainage | Diagnosis and action |
|---|---|---|---|
| Normal | 6,2-6,8 | 6,0-7,0 | All correct. Difference of ±0.5 is normal. |
| Acidified substrate | 6,5 | < 5,5 | Accumulation of acid salts. Flush substrate with water at pH 6.8-7.0 until drainage increases. Check nutrients. |
| Alkalinised substrate | 6,5 | > 7,5 | The substrate has accumulated lime or bicarbonates (often with hard water). Water with water at pH 5.8-6.0 for 2-3 consecutive waterings to flush out the alkalinity. |
| Sharp difference | 6,5 | > 1,5 pts difference | The substrate is very unbalanced. Flush thoroughly with clean water at the correct pH: 2-3 times the volume of the pot. |
How to collect drainage: put a clean plate under the pot before watering. Collect the water that comes out of the holes with a syringe or spoon and measure it with a pH meter. Do this at least once a week if you grow in coco or hydroponics; every 10-15 days in soil is sufficient if you have no symptoms.
Tap water in Spain: what you need to know
The pH of tap water varies significantly depending on the region and source. In Spain, most municipal networks supply water with a pH between 7.0 and 8.5, which means that you will almost always need to lower the pH before irrigating. In addition, many areas have «hard» water - with high concentrations of dissolved calcium and magnesium - which adds a layer of complexity.
| Type of water | Typical pH | Typical EC | Consideration for cultivation |
|---|---|---|---|
| Hard tap water (Madrid, inland) | 7,2 - 8,0 | 0.5 - 1.2 mS/cm | Always lower pH. The Ca and Mg in the water count towards the total EC: adjust the nutrient dosage. |
| Soft tap water (Galicia, Asturias, wetlands) | 6,5 - 7,5 | 0,1 - 0,4 mS/cm | More manageable pH. Add CalMag because the water is low in calcium and magnesium. |
| Reverse osmosis water | 6,0 - 7,0 | 0,0 - 0,05 mS/cm | Almost pure water. Always add CalMag and a pH corrector. The perfect basis for controlling exactly what goes into the plant. |
| Rainwater | 5,5 - 6,5 | 0,0 - 0,2 mS/cm | Generally acidic due to dissolved CO₂. Always measure: may be within range without correction, or need to be raised slightly. |
Chlorine in tap water: Chlorine added by municipal networks can affect the microbiology of the organic substrate and biological control products (killing Bacillus thuringiensis bacteria, for example). To remove it, leave the water in an open container for 24 hours or use an activated carbon filter. Chlorine is easily evaporated or filtered out.
Symptoms of incorrect pH vs. actual deficiency
This is the most important differential diagnosis to know how to make. When you see a visual impairment, the question is not «what nutrient is missing» but «why can't he absorb what he has?.
| Visual symptom | If pH is OK → actual deficiency | If pH is wrong → blockage |
|---|---|---|
| Young leaves pale yellow, green veins | Iron deficiency → add Fe chelate | high pH (> 7.0) blocks Fe → lower pH first |
| Brown spots and burnt tips | Calcium deficiency → add CalMag | low pH (< 5.8) blocks Ca → raise pH first |
| Interveinal yellowing of middle leaves | Magnesium deficiency → Epsom salt | Low pH or excess Ca blocking Mg → adjust pH |
| Small buds, poor flowering | Phosphorus deficiency → PK booster | pH out of 6.0-7.0 blocks P → correct pH before |
| Deformed or necrotic tips of new leaves | Boron or zinc deficiency | high pH blocks both → lower pH to 6,0-6,5 |
The correct protocol for any symptom:
- Measure the pH of the inlet and drain water.
- If out of range: correct it. Wait 3-5 days.
- If symptoms persist with correct pH: then it is a real deficiency that needs to be treated with the specific nutrient.
- Never add nutrients to correct a deficiency without first checking the pH. This is the mistake that leads to a substrate saturated with salts that cannot be absorbed.
The most common mistakes with pH
Do not calibrate the pH meter
An uncalibrated pH meter can give you readings within 0.5-1.0 pH deviation from reality. That means you think you are watering at 6.5 when you are actually at 7.2 or 5.8. Calibrate with buffer solutions at least once a week.
Measure pH before adding nutrients
Water alone and water with nutrients have different pH values. Always measure after mixing all the nutrients. If you measure before and correct, when you add the nutrients the pH will change and your correction will no longer work.
Add pH up and pH down in the same tank without mixing
If you overdo the pH down and then add pH up to compensate, without mixing well between each addition, you create very different pH zones within the same tank. Always mix after each addition, wait a few minutes and measure again before adding more corrector.
Ignoring drainage pH
The pH of the inlet water can be perfect and the substrate can be acidified by salt accumulation. Without measuring the drainage periodically, you have no information about the real state of the root zone.
Correcting the pH all at once
If the substrate has been at the wrong pH for weeks and you suddenly correct it with a very acidic or very alkaline flush, the sudden change stresses the roots as much as the wrong pH. Correction should be gradual: move the pH 0.2-0.3 points per watering until the target range is reached.
Conclusion: measure first, act later
The pH is the first variable to get under control before thinking about nutrients, techniques or any other optimisation. A crop with correct pH and basic nutrition produces much more than a crop with perfect nutrition and uncontrolled pH.
Investing in a good pH meter and getting into the habit of measuring it at every watering pays back that investment in the first harvest where you avoid a problem that would have taken weeks to recover from.
→ Apply this knowledge at every stage of the cycle with our Complete phased NPK guide.
→ Return to the Complete Cultivation Guide to see the full picture.
→ Choose your next genetics in the 00 Seeds catalogue.
Do you have symptoms that do not go away even if you correct the pH? Tell us in the comments: what pH you have in the inlet and drainage, what substrate you use and what visual symptom you have - we can help you diagnose it.
