


Farming Guides
Cannabis Pests: Identification and Treatment - Complete Guide
May
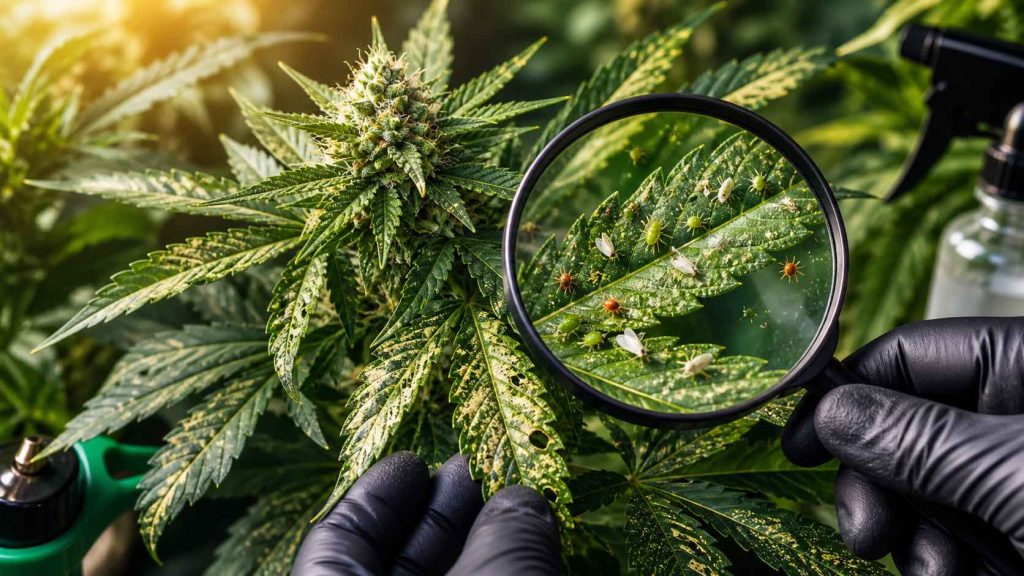
Pests don’t give you any warning. One day your plants are perfectly healthy, and three days later the undersides of the leaves are covered in white spots, new leaves appear misshapen, or the potting mix starts to smell musty. The time it takes you to identify the problem is the time the pests have to multiply.
This guide covers the most common pests affecting cannabis cultivation — both indoors and outdoors — with clear photographs of symptoms, life cycles, effective treatments and, above all, prevention. After all, the easiest pest to deal with is the one that never takes hold in the first place.
→ This guide is part of our Complete Guide to Growing Cannabis from Seed.
Table of contents
- Prevention: the first line of defence
- Red spider mite
- Soil gnats (fungus gnats)
- Thrips
- Aphid
- Mealy bug
- Caterpillars and Lepidoptera
- Summary table: symptom → pest → treatment
- Most commonly used products and when to use them
Prevention: the first line of defence
80% of pest problems in indoor cultivation can be prevented by taking four basic steps. They aren’t glamorous, but they work better than any treatment:
Environmental control
Spider mites thrive in dry, warm conditions. Fungi and soil-dwelling midges thrive in damp conditions. Most pests have preferred environmental conditions and become established when the environment is favourable to them. Maintaining the temperature between 20–26 °C and relative humidity at 50–65 % during the vegetative stage (dropping to 40–50 % during flowering) creates an inhospitable environment for most common pathogens and pests.
Air circulation
Insect pests — particularly thrips and aphids — move less and are less likely to establish themselves in areas with active air circulation. One or two fans that create movement amongst all the branches act as a real physical barrier, not just a means of strengthening the stems.
Quarantine of new material
The most common cause of infestation in indoor cultivation is the introduction of contaminated plant material: cuttings from other plants, unsterilised potting compost or even clothing that has been in contact with outdoor plants. Any new material brought into the grow room should undergo at least a week of isolated observation before coming into contact with the main crop.
Systematic weekly review
Set aside five minutes once a week to check the undersides of the leaves, the stem near the soil and the surface of the growing medium for each plant. Most pests can be spotted visually before their population explodes, provided you know where to look. An early-stage colony of red spider mites — ten or twenty individuals — can be eliminated in a single treatment. An established colony may take weeks to control.
Red spider mite — Tetranychus urticae
The most feared pest in indoor cannabis cultivation. Small, quick to reproduce and capable of destroying a healthy plant within 10–14 days if left untreated. Under optimal conditions for the pest (dry heat, above 27 °C and humidity below 40 %), a female can lay 200 eggs in her lifetime, and the complete egg-to-adult cycle takes less than a week.
How to identify it
| What to see | Description |
|---|---|
| Dotted on the beam | Tiny yellow or whitish spots scattered across the upper surface of the leaf. The spider mites pierce the cells to feed. |
| Spiders on the underside | They are 0.3–0.5 mm in size, and are red, yellow or green depending on the species and the season. You need a magnifying glass to see them clearly. |
| Cobwebs | In advanced infestations, very fine silk threads can be seen between the leaves and buds. This is a sign that the colony is large and has been there for some time. |
| Eggs | Translucent or whitish spherical spots attached to the underside, visible under a 30x magnifying glass. |
Treatment according to the level of infestation
Mild infestation (few leaves affected, no cobwebs):
- Neem oil at a concentration of 0.5–1 % in water with neutral soap as an emulsifier. Apply to the undersides of leaves in the evening, every 3 days for 2–3 weeks. Neem acts as a contact insecticide and a hormonal disruptor that prevents reproduction.
- Potassium soap at 1–2 %: kills on contact by dissolving the mite’s cuticle. Effective, inexpensive and low in toxicity to the plant provided it is not applied in excess.
Moderate infestation (several affected plants, early signs of cobwebs):
- Abamectin: a naturally occurring acaricide (derived from a fungus) that is highly effective against red spider mites. Wear gloves and a face mask when using it; it has a safety interval of 7–10 days.
- Wettable sulphur: preventative and curative, particularly effective for outdoor use. Do not apply at temperatures above 30 °C or when flowering is well advanced.
- Natural predators: Phytoseiulus persimilis o Neoseiulus californicus, predatory mites that feed on spider mites without harming the plant. Ideal for long-term biological control in continuous production systems.
Severe infestation (widespread cobweb-like patterns, yellow leaves):
- Combine abamectin with potassium soap, alternating treatments every 2 days to prevent the colony from recovering.
- Remove cobwebs mechanically before treating: the insecticide does not penetrate the silk effectively.
- If the plant is at an advanced stage of flowering, consider whether it is worth treating it or harvesting it and clearing the area completely before the next cycle.
Cleaning between cycles: Red spider mites spend the winter on the edges of the grow room, in the corners and in the ventilation systems. Cleaning all surfaces with a 3 % hydrogen peroxide solution or isopropyl alcohol between harvests and the start of a new cycle is essential if you have had an infestation.
Ground mosquito — Bradysia spp. (fungus gnats)
The adult is a nuisance: a small mosquito (2–3 mm) that flies around plants and the growing medium. The real problem is the larvae, which live in the top layers of the growing medium and feed on fine roots and root hairs. A severe infestation can destroy the root system of a young plant in a matter of days.
How to identify it
- Adults: Dark, slender midges that fly in a zigzag pattern near the plant pot when you move it. They look like fruit flies but are darker and slower.
- Larvae: Translucent white worms, 4–6 mm long, with shiny black heads. They are found in the top 5 cm of the substrate. You can spot them by placing a piece of raw potato on the surface of the substrate: the larvae are attracted to it and can be counted after 24–48 hours.
- Damage to the plant: Slowed growth for no apparent reason, yellowing, and a generally weak appearance. In young plants, it can cause sudden collapse.
Treatment
Cultural measures (always first):
- Allow the growing medium to dry out thoroughly between waterings. The larvae need moisture to survive: a growing medium that dries out well between waterings will destroy most of the larval population without the need for any chemicals.
- A layer of coarse silica sand or perlite on the surface of the substrate (2–3 cm): this prevents adults from laying eggs and hinders the emergence of larvae.
- Yellow sticky traps placed on the substrate: these capture adults and enable the severity of the infestation to be monitored.
Biological treatment:
- Bacillus thuringiensis israelensis (Bti): a bacterium that kills dipteran larvae when ingested. Completely harmless to plants, humans and animals. Apply via the irrigation system, 1–2 times a week for 3–4 weeks. It is the most recommended treatment as it does not lead to resistance and can be used at any stage, including flowering.
- Steinernema feltiae: predatory nematodes that prey on larvae in the growing medium. Highly effective, but require a moist growing medium and a temperature of between 14–28 °C. Apply via the irrigation system once a week for 2–3 weeks.
Chemical treatment (if biological treatment is not sufficient):
- Systemic imidacloprid applied via irrigation: effective but with a long safety interval. Do not use during flowering.
- Diatomaceous earth mixed with the substrate: it acts mechanically by destroying the larvae’s cuticle. Its effectiveness varies, but it is non-toxic.
Trips — Frankliniella occidentalis and other species
Tiny insects (1–2 mm) that feed by scraping plant cells. They leave a distinctive trail that is very easy to identify. During flowering, as well as causing direct damage, they act as vectors for viruses such as TSWV (spotted wilt), which can ruin an entire crop.
How to identify them
- Silver scratches on the leaf surface: lines or patches with a metallic sheen where thrips have scraped and emptied the cells. This is the most characteristic symptom and the one that allows them to be identified with the naked eye.
- Black specks Regarding the scratches: these are the droppings of thrips, which often accompany feeding damage.
- The insects themselves: slender, elongated, pale yellow, brown or black in colour, depending on the species and stage of development. They move quickly when exposed to light. In flowering buds, they can be seen amongst the petals and bracts.
- Deformation of new leaves: in severe infestations, new leaves appear twisted or develop irregularly because thrips feed on the tissue before it matures.
Treatment
- Spinosad: a biological insecticide (produced by a soil bacterium) that acts on the nervous system of insects. Highly effective against thrips, with low environmental impact and a short safety interval (3–5 days). Apply at the coolest time of day. Rotate with other products to prevent resistance.
- Natural pyrethrins: chrysanthemum extract, fast-acting on contact. Effective but breaks down quickly (an advantage for flowering). Combine with neem oil for greater persistence.
- Biological predators: Amblyseius cucumeris (a mite that preys on thrips larvae) and Orius laevigatus (pirate bug, a highly effective generalist predator). Ideal for crops with continuous growing cycles.
- Blue traps Sticky traps: thrips are attracted to the colour blue. Useful for monitoring and for reducing the adult population.
Important during flowering: Thrips on buds are particularly problematic because contact pesticides do not penetrate the dense structure of the bud effectively. If you spot thrips during the late flowering stage, the safest option is to treat with a low dose of spinosad and harvest as soon as the trichomes are ready.
Aphid — Aphis gossypii and other species
Aphids are colonies of soft-bodied insects (1–3 mm) that feed on sap by sucking it directly from the phloem. They weaken the plant, secrete honeydew (which encourages sooty mould) and, outdoors, can attract ants that protect them from their natural predators. They reproduce without the need for males — a single female can produce dozens of offspring a week — and in warm conditions, the population can explode within days.
How to identify them
- Visible colonies on the undersides of leaves, on tender stems and at growth points. They are stationary (they do not move away) and easy to spot: compact clusters of pale green, yellow, black or brown insects, depending on the species.
- Molasses: a sticky, shiny substance on the leaves. It is excreted by aphids and encourages the growth of sooty mould (a black fungus).
- Ants: Outdoors, the sight of ants climbing up and down the stem is often a sign that there are aphids higher up.
- Curled or misshapen leaves: particularly in new shoots where the colony is concentrated.
Treatment
- Potassium soap 1–2 %: the first choice due to its low impact. Apply directly to the colonies, ensuring the undersides are well covered. Kills on contact: any insects not touched by the soap will survive, so thorough coverage is key.
- Neem oil: complements potassium soap well by adding systemic and repellent action.
- Biological control: Aphidius colemani (a parasitoid that lays its eggs inside the aphid) and Chrysoperla carnea (lacewing larvae, voracious predators) are the most effective. Outdoors, encourage ladybirds: an adult ladybird eats between 50 and 100 aphids a day.
- Pyrethrins + soap: in severe infestations, this combination produces rapid results. The soap breaks down the cuticle and the pyrethrin acts on the nervous system.
Mealy bug — Planococcus citri and others
Less common than spider mites or thrips, but particularly difficult to eradicate once established. Mealybugs protect themselves under a layer of white, cottony wax that acts as a physical barrier against contact insecticides. They congregate at growth points, in the leaf axils and, during flowering, inside the buds.
How to identify it
- Cotton-like white deposits in the leaf axils, at the nodes of the stem and in the buds. The cotton is the protective wax beneath which the females and their eggs live.
- Molasses: like aphids, they secrete a sticky substance.
- Slower growth and a generally weak appearance for no apparent reason.
Treatment
- 70% isopropyl alcohol % Apply directly to each colony using a cotton bud: this dissolves the wax layer and kills the insects on contact. Laborious but very effective for localised infestations.
- Neem oil + potassium soap When applied to foliage: the soap breaks down the waxy coating and the neem acts on the exposed insects.
- Cryptolaemus montrouzieri: a predatory ladybird specialising in mealybugs. The most effective biological control option for established infestations.
- Systemic imidacloprid in irrigation: in severe infestations where foliar treatment is ineffective. Long safety interval: do not use during flowering.
Caterpillars and Lepidoptera
When growing outdoors, caterpillars pose a real threat, particularly during the summer months. The most common in Spain are the larvae of the cannabis moth (Helicoverpa armigera) and several species of noctuid moths that attack at night. The most dangerous damage they cause is not to the outside of the plant: rather, they burrow into the buds to feed from within, creating damp tunnels where Botrytis fungus develops rapidly.
How to identify them
- Dark stools (frass) on the leaves and on the surface of the buds: black or brown specks that look like ground pepper. A sign that a caterpillar is feeding nearby.
- Holes in leaves: irregular bite marks on the leaf blade, particularly on young leaves.
- Bud with internal necrosis: if you cut open a bud that looks healthy on the outside but is brown and damp on the inside, there’s probably a caterpillar inside and a secondary botrytis infection.
- The caterpillars themselves: 1 to 5 cm depending on the stage of development; green, brown or camouflaged to blend in with the plant. Look for them at night with a torch: many species are nocturnal.
Treatment
- Bacillus thuringiensis kurstaki (Btk): the first and best option. A bacterium that produces a toxin lethal to lepidopteran larvae when ingested, but harmless to everything else. Apply at dusk (when the caterpillars are active and feeding), every 5–7 days for 3–4 weeks. It can be used right up until harvest time.
- Manual extraction: Look for and remove caterpillars by hand at night. Outdoors, where there are few plants, this is the cleanest method.
- Insect screens 0.8–1 mm: on a terrace or balcony, they physically protect the buds from being laid in. They allow light and air to pass through.
- Natural pyrethrins: in active infestations, it acts quickly on the adults. It does not reach the larvae inside the bud.
Summary table: symptom → pest → treatment
| Visual symptom | Possible pest | Priority treatment |
|---|---|---|
| Yellow spots on the leaves + insects on the underside + cobwebs | Spider mite | Potassium soap + neem; abamectin for severe infestations |
| Small flying mosquitoes + unexplained poor growth | Fungus gnats | Allow to dry + Bacillus thuringiensis israelensis in irrigation water |
| Silver streaks + clusters of black dots | Trips | Spinosad; blue traps; Amblyseius cucumeris |
| Static colonies on the underside of leaves + molasses + ants | Aphid | Potassium soap; biological control using Aphidius |
| White cotton in the armpits and knots | Mealy bug | Undiluted isopropyl alcohol; neem + foliar soap |
| Dark excrement on leaves + holes + necrosis in the bud | Caterpillar / Lepidopteran | Bacillus thuringiensis kurstaki; manual extraction |
| White powder on the leaves (doesn’t wipe off easily) | Powdery mildew (a fungus, not a pest) | Bicarbonate; wettable sulphur; improve ventilation |
| Bud tips with grey mould inside, brown bracts | Botrytis (fungus, not a pest) | Remove affected parts; reduce humidity; improve circulation |
Most commonly used products: what they are, how they work and when to use them
| Product | Origin | Target pests | Should it be used during flowering? |
|---|---|---|---|
| Potassium soap | Mineral | Mites, aphids, whiteflies | Yes, up to two weeks before harvest |
| Neem oil | Plant-based | Mites, aphids, thrips, powdery mildew | Yes, during early flowering; no, during late flowering (affects flavour) |
| Spinosad | Biological (bacteria) | Thrips, caterpillars, fungus gnats | Yes, lead time 3–5 days |
| Bacillus thuringiensis (Bt) | Biological (bacteria) | Caterpillars (kurstaki), fungus gnats (israelensis) | Yes, right up until harvest day |
| Abamectin | Biological (fungus) | Spider mites, thrips | Not in flower. Safety period: 7–10 days minimum |
| Natural pyrethrins | Plant (chrysanthemum) | Aphids, thrips, whitefly | Yes, during early flowering; use with caution during mid-flowering |
| Wettable sulphur | Mineral | Powdery mildew, red spider mite (preventative) | Not at an advanced stage of flowering; not at temperatures > 30 °C |
Golden rule for flowering: The closer you get to harvest, the more cautious you need to be with treatments. In the last two weeks before harvest, the only foliar treatment you can apply with complete confidence is plain water or very dilute potassium soap. Any product residue left on the bud will end up in the smoke or vapour.
Product rotation: Do not use the same insecticide for more than 2–3 consecutive cycles. Pests develop resistance quickly, particularly spider mites and thrips. Alternate between products with different modes of action (contact, systemic, hormonal, biological).
→ Return to the Complete Cultivation Guide for the next step: harvesting and curing.
→ Resistant strains also help to minimise problems. See the 00 Seeds catalogue to view the technical data sheets containing resistance data for each variety.
Do you have a symptom that isn’t listed here? Describe it in the comments: the affected part of the plant, what the leaf looks like, whether you’re growing indoors or outdoors, and what stage of the growing cycle you’re at — we’ll help you identify it.
